Before you enable Sharelov’s Auto-Publish to Instagram, you’ll need to connect your Facebook Page to your Instagram Business account (if you haven’t already).
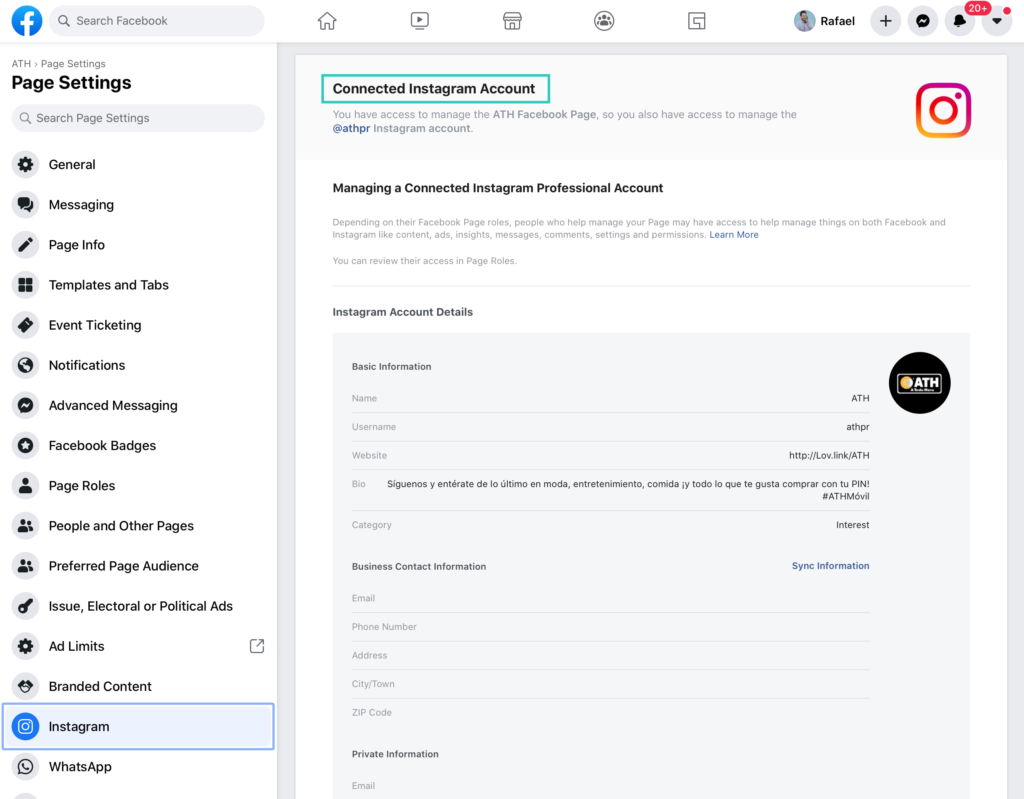
Please verify that your Instagram account is properly connected by looking for the “Connected Instagram Account” verification notice on your Facebook Page Instagram settings.
Once you’ve confirmed that your Facebook Page and Instagram Business account are connected, you’re ready to get started.
Here’s how to enable the Sharelov auto-publish feature:
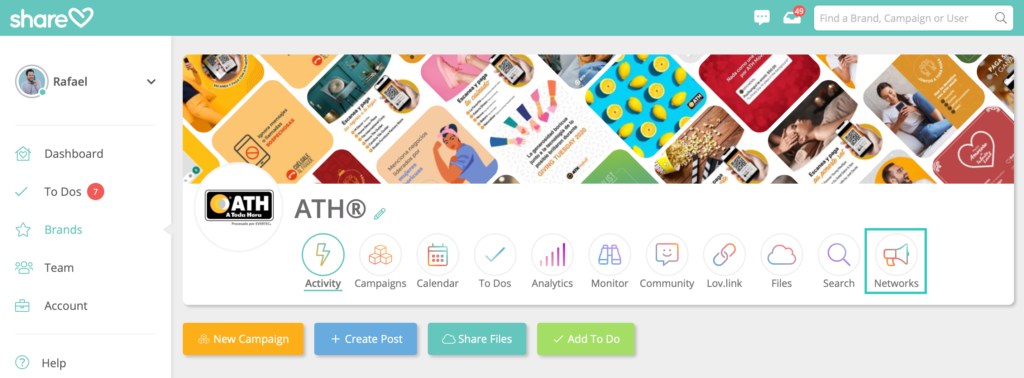
1. Go to your Sharelov brand page and click the “Networks” button.
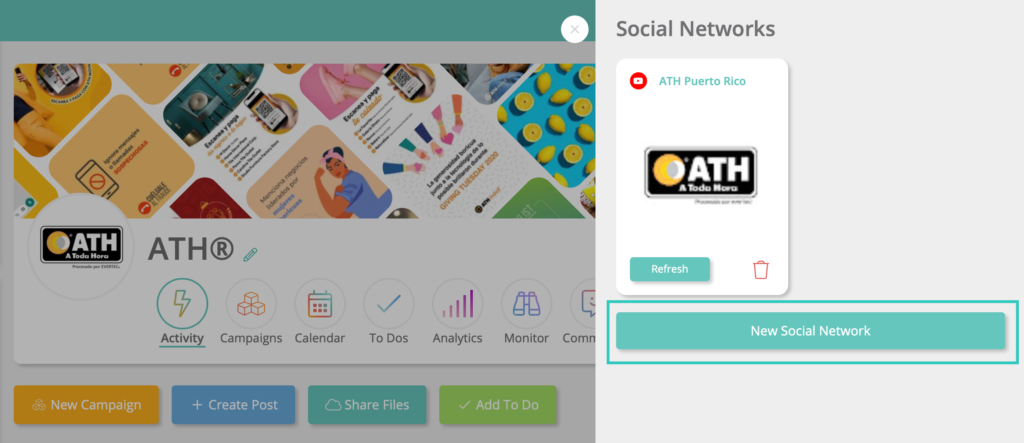
2. Next, click the “New Social Network” button.
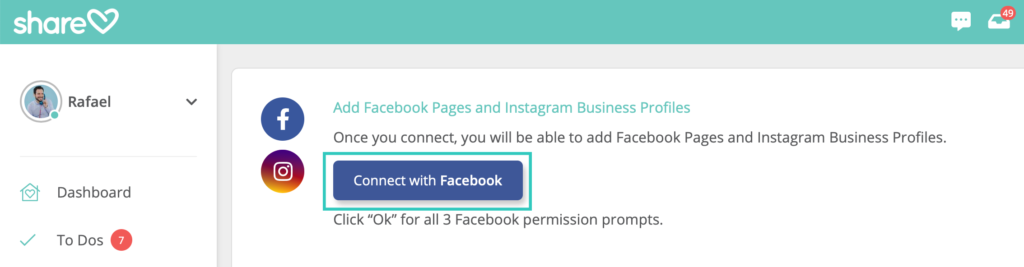
3. Click the “Connect with Facebook” button.
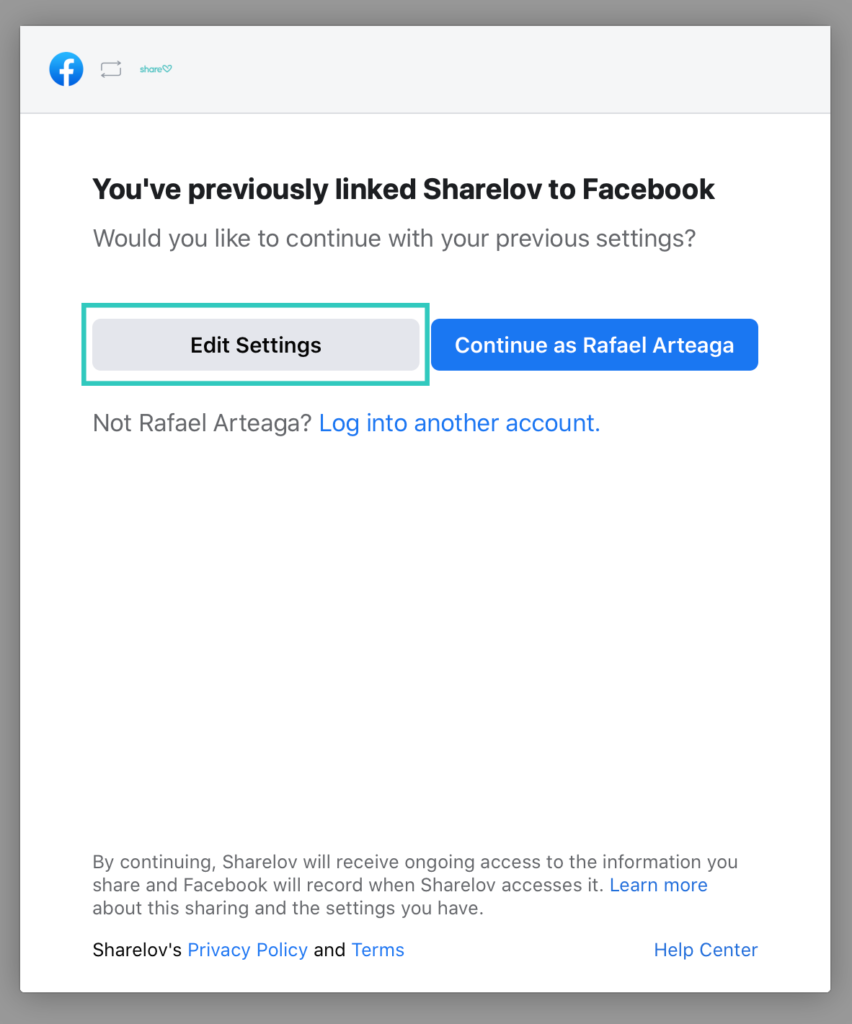
4. Click the “Edit Settings” button.
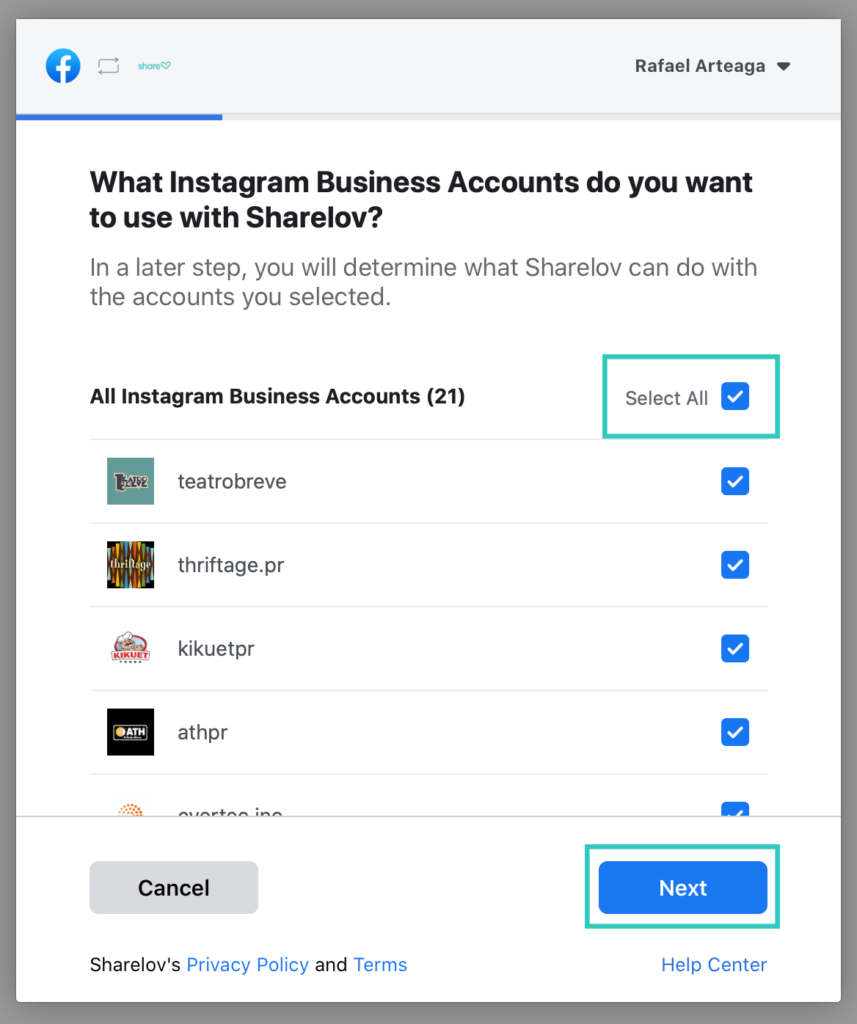
5. Click “Select All” next to “Instagram Business Accounts,” then click “Next.”
Note: All accounts must be checked to enable Auto-Publish to Instagram.
6. Click “Select All” next to “All Pages,” then click “Next.”
Note: All pages must be checked to enable Auto-Publish to Instagram.

7. Select “YES” for all options under “What Is Sharelov Allowed To Do?” then click “Done.”
Note: All permissions must be set to “YES” to enable Auto-Publish to Instagram.
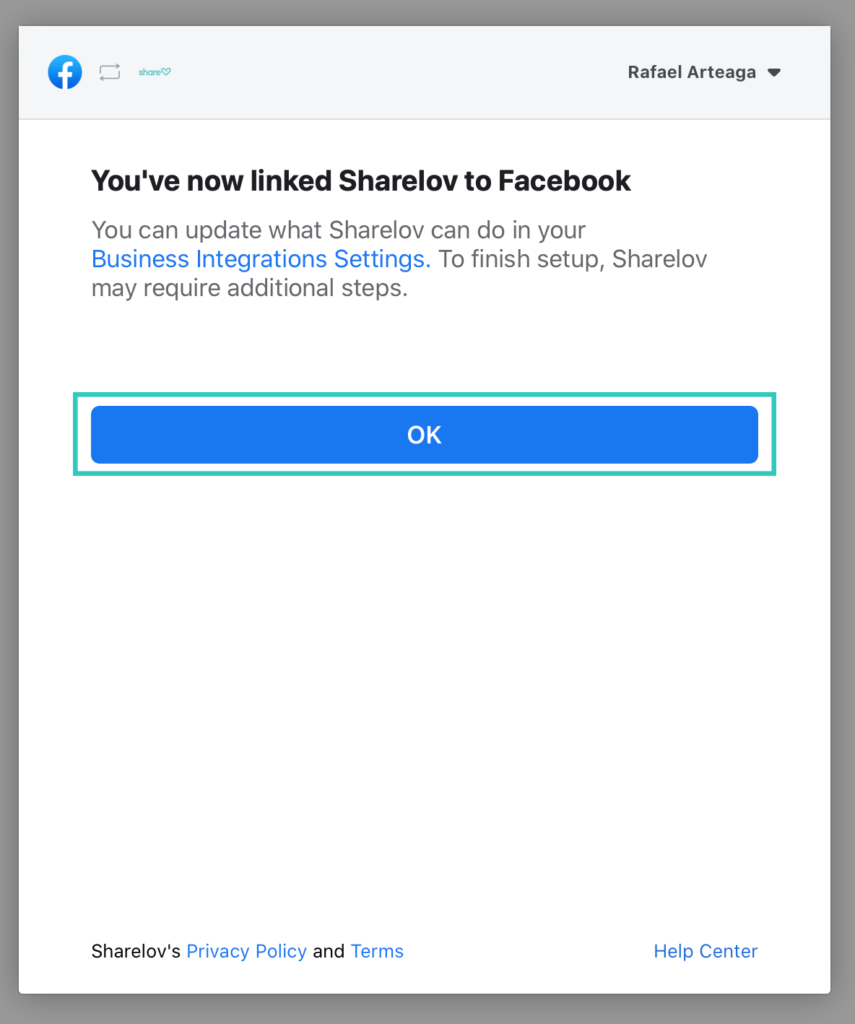
8. Click “Ok” to return to Sharelov.
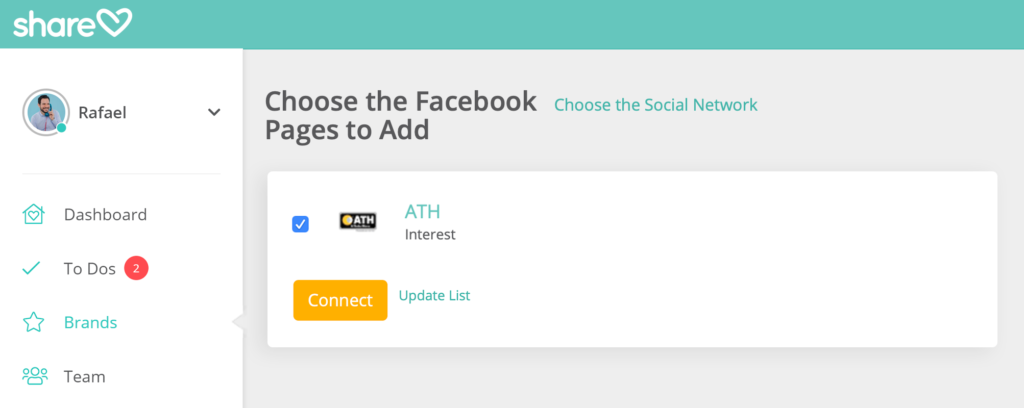
9. Select your Facebook Page in the “Choose The Facebook Pages To Add” panel, then click “Connect” to activate the auto-publish feature.
Congratulations! You are now ready to auto-publish single-photo posts and single-video posts from Sharelov to Instagram!
Leave A Comment?